Growing microgreens is easy, cheap and above all very nutritious. Many seeds can be grown as both sprouts and microgreens.
The difference from regular farming is that you can get access to fresh and nutritious food much faster, and it can be done all year round without a greenhouse or garden.
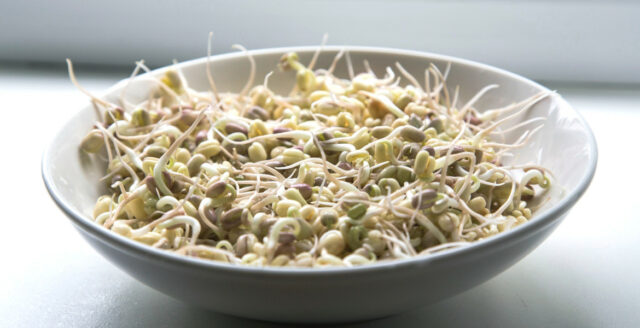
A sprout comes from a seed that comes into contact with water and bursts into a small tail. In other words, it is the first stage of the plant’s life cycle. Once this happens, the whole seed and sprout can be eaten. In the seed stage, the nutrients are retained and are therefore more difficult for the body to absorb, but as the seed sprouts, the nutritional content also changes. The amount of antioxidants and vitamins increases and they become more easily absorbed by the body and also easier to digest in the gut, according to the Swedish farming paper Land.
Often the only limit is your imagination when it comes to growing microgreens. In general however, you should avoid potatoes and tomatoes, as you should not eat their sprouting parts. However, you can eat the leaves of beetroot and carrots, for example.
Different seeds
There are many things that can be sprouted. However, one tip is to buy seeds that are intended for microgreens or that are sold for human consumption; seeds for sowing can be treated in various ways to resist plant diseases, for example. Seeds are available in various online shops, but can also be bought in supermarkets or garden centers.
Mung beans are described by many as a favorite, but various lentils are also great for sprouting. Remember that the lentils must be whole and not split. Broccoli has a mild flavor and is suitable for beginners, and buckwheat is also a good beginner’s sprout. Otherwise, the classic alfalfa gives a fresh flavor. Some companies also sell seed mixes.
Use a strainer and bowl
There are special sprouting jars and racks available, but you can also use a colander or a strainer. You can also make your own sprouting jar by using a glass jar, threading it onto a screen or fine mesh (such as a piece of nylon stocking) and securing it with a rubber band.
Start by rinsing the seeds in cold water. Then soak them in cold water in a bowl. The amount of seeds to use and how long they should be soaked can vary. But one rule you can follow is that they should be soaked for about eight hours.
Then pour the seeds into the strainer, rinse again thoroughly and place the strainer with the seeds over the bowl and put a towel over it. This will allow the seeds to drip off. If you use a sprouting jar, leave the jar tilted at an angle and turn the jar from time to time. Then rinse the seeds two to three times a day. Sprouts can be stored in both dark and light. Light will give them more color, but some varieties may taste more bitter. Some people let the sprouts grow in the dark first and then put them in the light towards the end so they get some color.
Time before the sprouts are ready may also vary, for example quinoa can be ready in a little more than a day while yellow peas can take up to five days. Once they have grown their tails, they can be stored in the fridge for a few days in a container that lets some air in, but they should be eaten as soon as possible. Some sprouts can sometimes develop a “white fluff” that can resemble mold, but these are actually fibrils that the seed uses to trap moisture in the air when it starts to dry and are not dangerous. What you should keep in mind, however, is that if the sprouts get too wet, mold might also develop.

Growing microgreens
You can also take the sprout and plant it in soil, or alternatively in water or wet paper, so that it forms roots. Once the sprout has grown, you can cut off the plant and eat it, but you leave the roots and do not eat them. In basic terms, you grow on a small scale.
Often most of the things you sprout can continue to grow into microgreens. However, cress and wheatgrass are classics to grow. If you like mustard, you can try mustard seeds, which give a more spicy flavor. Sunflower seeds and radishes are also commonly grown.
Soil or water
Always start by rinsing the seeds thoroughly. Some say that most seeds need to be soaked beforehand, while others say that only some seeds need this. In general, the actual germination of the seed can take longer if you don’t soak and some seeds may not germinate at all.
The seeds should then start to germinate. This can be done directly in soil, in damp kitchen paper or, as above, with water. The seeds can then be sprinkled evenly over the surface. Remember to keep it moist and if you use soil, you should make holes in the bottom in order to drain off excess water. You can also put a lid on so that the seeds can stand in the dark. It is also beneficial to use a spray bottle in the beginning. If using paper towels, lay out a damp piece of paper on a plate and sprinkle the seeds. Spray with water and cover.
When the tails start to emerge you can place them on the windowsill. Whatever method you use, keep them moist. If you’re growing microgreens in water, you can put them in the light as soon as a root mat has formed and the sprouts are attached to each other. Then you can start watering with running water instead of a spray bottle. You should then rinse/water the microgreens once a day, but do not leave the water in the container.
After four to five days your sprouts are ready to harvest!


